How to Draw Biology Diagrams: A Simple Step-by-Step Guide for Students
How to Draw Biology Diagrams: A Simple Step-by-Step Guide for Students Did you know that biology diagrams account for up to 30% of marks in many science exams? Despite this, countless students struggle with drawing clear, accurate biology diagrams that earn full points. I've seen firsthand how frustrating it can be to perfectly understand a […]
Key Takeaways
- Plant diagrams form the foundation of biology drawing skills.
- After mastering plant diagrams, students often progress to human organ systems—more complex yet fascinating structures to illustrate.
- Cellular structures represent the microscopic building blocks of life, requiring precision and attention to detail when illustrating.
- Biological processes unfold through intricate choreography, making them both challenging and rewarding to illustrate.
- Perfect biology diagrams require more than just accuracy—your final touches and exam preparation strategies often determine your grade.
How to Draw Biology Diagrams: A Simple Step-by-Step Guide for Students
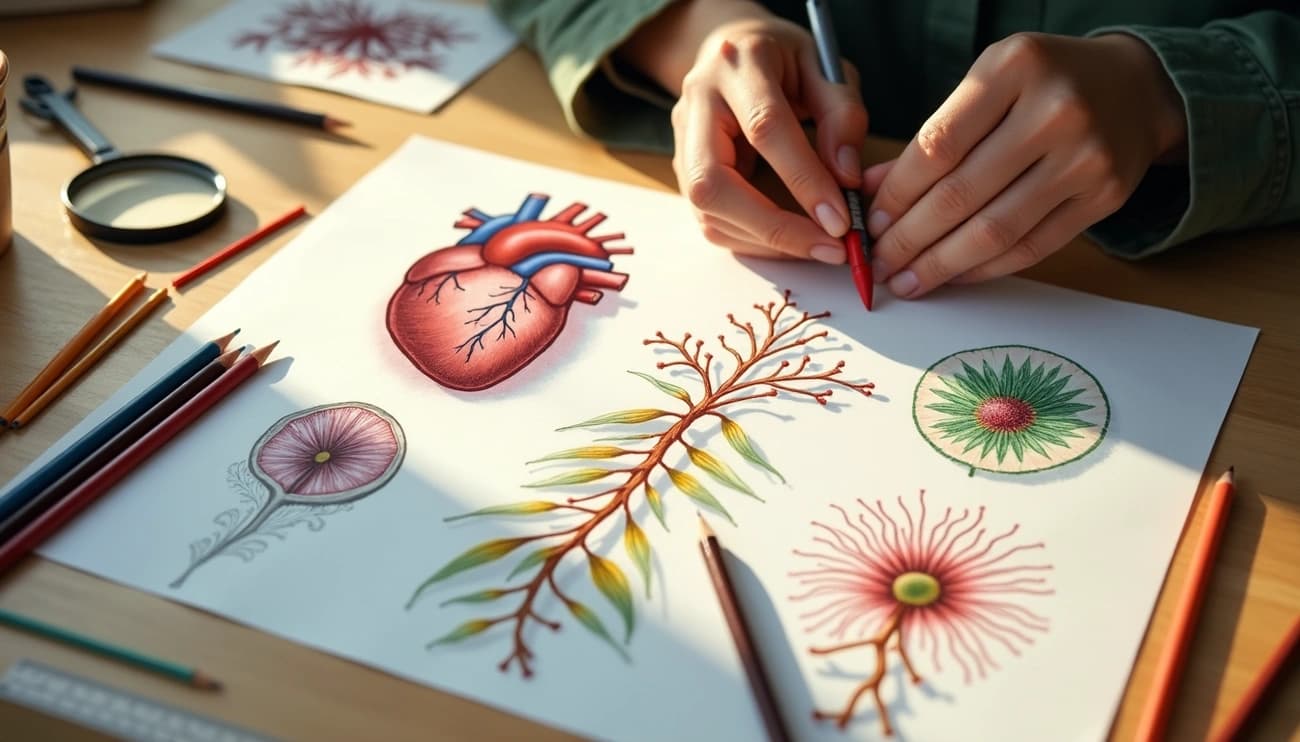
Plant diagrams form the foundation of biology drawing skills. This step-by-step guide walks you through the full process, with practical examples and expert tips at every stage. (This guide has been with the latest 2025 insights.)
I’ve seen firsthand how frustrating it can be to perfectly understand a concept but lose marks because of poorly executed diagrams. Whether it’s a simple plant cell or the complex human heart, the ability to draw biology diagrams accurately is an essential skill that directly impacts your grades.
The good news? You don’t need artistic talent to create excellent biology diagrams. Actually, it’s all about following specific steps and understanding what examiners are looking for.
In this guide, I’ll walk you through drawing various biology diagrams step-by-step – starting with basic plant structures before moving to more complex human organs and cellular components. By the time you finish reading, you’ll have the confidence to tackle any biology diagram that appears in your coursework or exams.
Let’s transform those rough sketches into diagram masterpieces that will impress your teachers and boost your grades!
Navigating IB Biology can feel overwhelming, especially if it's your first time. If you'd like personalised guidance from someone who's helped hundreds of IB students, our IB Biology tutors are here to help. Tell us what you need →
Start with Simple Plant Diagrams
Plant diagrams form the foundation of biology drawing skills. Starting with simpler structures helps build confidence and technical ability that will serve you well when tackling more complex diagrams later. Let’s begin with one of the most common plant diagrams students need to master.
How to draw a stomata step-by-step
Stomata are tiny pores found on leaf surfaces that regulate gas exchange and water loss through transpiration. Drawing accurate stomata diagrams is straightforward when you follow these steps:
- Start by drawing two bean-shaped cells facing each other with their concave sides on the inside. These represent the guard cells of the stomata.
- Draw the outer walls of the guard cells thicker than the inner walls. This difference is crucial as it affects how stomata open and close.
- Add small circles on the convex side of the bean shapes to represent nuclei.
- Double-line the concave sides and shade them lightly to show depth.
- Draw rectangular-shaped cells surrounding the guard cells—these are the subsidiary cells that support guard cell function.
- The space between the guard cells is the stomatal pore. Make sure to leave this area clear.
For closed stomata, draw the guard cells closer together with almost no space between them. Conversely, for open stomata, create more space between the guard cells to show the open pore.
Labeling tips for guard cells and stoma
Clear labeling of stomata diagrams separates average work from excellent biology diagrams. First, identify all essential parts: epidermal cells, subsidiary cells, guard cells, and the stomatal pore.
When labeling guard cells, note their specialized kidney or bean shape, which enables them to control the stomatal opening. These cells contain chloroplasts, unlike typical epidermal cells, so add small dots inside to represent these structures.
For subsidiary cells, ensure your labels indicate their position adjacent to guard cells. These cells support guard cell movement and serve as reservoirs for ions and water.
The stomatal pore should be labeled clearly as the central opening. Additionally, include the function of each part in parentheses for extra clarity—for instance, “Guard Cells (control opening and closing of stomata).”
Drawing flower structure with reproductive parts
Moving from cellular to organ-level plant diagrams, flower structures represent excellent practice for more complex biological drawings:
- Begin with the receptacle at the base—draw this as a slightly widened section of the stem that supports the entire flower.
- Add sepals, the small leaf-like structures that protected the flower bud, extending outward from the receptacle.
- Draw the petals, typically the most colorful part of the flower, arranged in a circular pattern.
- For male reproductive parts (stamens), draw slender filaments topped with anthers. Include 4-5 stamens around the center of the flower.
- In the center, draw the female pistil with three distinct parts: the stigma (top), style (middle section), and ovary (bottom, enlarged section).
Label each part with straight lines extending from your diagram. For reproductive structures, note their functions: anthers produce pollen, while the ovary contains unfertilized seeds (ovules).
When drawing any biology diagram, remember that accuracy and clarity matter more than artistic perfection. Focus on correct proportions and clear distinctions between different structures rather than beautiful renderings.
Move to Human Organ Systems
After mastering plant diagrams, students often progress to human organ systems—more complex yet fascinating structures to illustrate. Human organ diagrams require greater attention to detail, although the fundamental principles remain similar.
Drawing the human heart with chambers and valves
The heart, a muscular organ about the size of two clenched fists, pumps blood throughout the body. To draw this vital organ accurately:
- Begin with a tilted acorn-like shape for the main body of the heart. Position it slightly to the left for anatomical accuracy.
- Add the right atrium as a rounded bump extending across the top left side of your drawing. Remember, in anatomical position, the heart’s right side appears on your left.
- Draw three major vessels at the top:
- The superior vena cava (a large tube from the top of the right atrium)
- The aorta (a wide, upside-down U-shaped vessel to the right of the atrium)
- The pulmonary artery (wrapping around behind the aorta)
- Sketch the four chambers inside your outline:
- The right atrium (upper right, receives deoxygenated blood)
- The right ventricle (lower right, pumps blood to lungs)
- The left atrium (upper left, receives oxygenated blood)
- The left ventricle (lower left, pumps blood to body)
- Add the four valves that prevent backward blood flow:
- Tricuspid valve (between right atrium and ventricle)
- Pulmonary valve (between right ventricle and pulmonary artery)
- Mitral valve (between left atrium and ventricle)
- Aortic valve (between left ventricle and aorta)
Notably, using colors helps distinguish structures—traditionally, blue for deoxygenated blood vessels and red for oxygenated ones.
Sketching the human brain with folds and lobes
The brain, weighing about three pounds in adults, controls all body functions and embodies mind and soul. To draw this remarkable organ:
- Start with a large bean-shaped outline for the cerebrum—the most prominent region divided into right and left hemispheres.
- Sketch the cerebellum (“little brain”) as a smaller, cauliflower-like structure at the lower back of the brain.
- Connect the cerebellum to the cerebrum, then add a narrow tube extending downward to represent the brain stem.
- Initially, draw a few major folds across the cerebrum, then add numerous smaller squiggles throughout to represent the gyri (bumps) and sulci (grooves) that increase the brain’s surface area.
- Divide the cerebrum into four lobes by drawing these landmark features:
- The longitudinal fissure (dividing the hemispheres)
- The central sulcus (running from top to about midway down)
- The lateral fissure (curving gently from front to back)
Tips for labeling the cerebrum and cerebellum
Effective labeling transforms a simple drawing into an informative biology diagram. For brain structures:
- Use straight lines extending from specific areas, ensuring lines don’t cross. Connect these to clear, legible text.
- When labeling the cerebrum, identify the four major lobes and their functions:
- Frontal lobe: personality, behavior, movement, speech
- Parietal lobe: sensation, spatial awareness
- Temporal lobe: hearing, language understanding
- Occipital lobe: vision processing
- For the cerebellum, indicate its primary functions of coordination, balance, and posture.
- Consider using a color-coding system—different colors for each lobe assist with visual learning and retention.
Furthermore, avoid crowding your diagram with excessive labels. Instead, choose the most relevant structures based on your curriculum. Although the brain contains many parts, focusing on key structures produces clearer, more effective biology diagrams.
Remember that accuracy matters more than artistic perfection. Your biology diagrams should prioritize correct proportions and relationships between structures rather than photorealistic detail.
Understand Key Cellular Structures
Cellular structures represent the microscopic building blocks of life, requiring precision and attention to detail when illustrating. These diagrams demonstrate your understanding of fundamental biology concepts at their most basic level.
How to draw a neuron with axon and dendrites
Neurons, the specialized cells responsible for transmitting information through electrical and chemical signals, have a unique structure that follows a specific drawing process:
- Start by drawing a star-like shape with one extended corner—this forms the cell body (soma).
- From the extended corner, draw a thin tube-like structure—this is the axon.
- Around the axon, add oval bulbs representing the myelin sheath, which insulates the axon and speeds up signal transmission.
- Draw small gaps between the myelin bulbs—these are the Nodes of Ranvier, crucial for enhancing signal speed.
- At the axon’s end, create branches with small circles at their tips—these are axon terminals containing synaptic vesicles that release neurotransmitters.
- Return to the cell body and extend the remaining corners, adding irregular branches—these are dendrites that receive signals from other neurons.
- Finally, draw a circle inside the cell body with dots to represent the nucleus.
Remember to label each part clearly, showing how dendrites receive signals, the cell body processes them, and the axon transmits them to the next neuron.
Steps to sketch a human eye with internal parts
The human eye’s intricate structure requires a methodical approach:
- Begin with the basic eye shape—a modified circle with the cornea bulging slightly at the front.
- Draw the sclera (white outer portion) as a curved line parallel to the inside of your diagram.
- Add the iris (colored portion) as an oval in the center front, with the pupil as a smaller oval within it.
- Behind the pupil, sketch the lens, attaching it to the surrounding ciliary bodies.
- Draw the retina as a layer along the back interior surface.
- Add the cornea as a transparent dome over the iris.
- Include the optic nerve at the back as a tube-like structure.
Drawing the nephron and its components
The nephron, the kidney’s microscopic functional unit, consists of several key parts:
- Start with Bowman’s capsule—a cup-like structure containing a ball of capillaries (glomerulus).
- Draw the proximal convoluted tubule as a highly coiled tube extending from Bowman’s capsule.
- Continue into the loop of Henle—a U-shaped structure with descending and ascending limbs.
- Connect this to the distal convoluted tubule, another coiled section.
- End with the collecting duct that receives fluid from multiple nephrons.
Label each structure with its function—filtration occurs in the glomerulus, while the tubules handle reabsorption and secretion of various substances.
Practice Diagrams for Processes
Biological processes unfold through intricate choreography, making them both challenging and rewarding to illustrate. Process diagrams connect the static structures you’ve learned to draw with the dynamic functions that define life itself.
Pollen grain germination on stigma
To draw pollen germination accurately, begin with several oval-shaped pollen grains resting on a receptive stigma surface. Next, from one pollen grain, extend a thin tube growing downward through the stigma’s surface. This represents the pollen tube that forms when pollen hydrates upon landing. The tube cell moves through one of the germ pores, with the tube nucleus positioned at the tip of this growing extension. Inside the tube, include two small circles representing the male gametes that will eventually participate in fertilization.
The stigma should be drawn with a slightly rough texture to show its receptive nature. Label the essential components: pollen grain, pollen tube, tube nucleus, and male gametes. Including the style and ovary below provides context for the tube’s destination.
Photosynthesis diagram basics
For photosynthesis diagrams, start with a cross-section of a leaf showing:
- The upper epidermis as a single-cell layer
- Palisade mesophyll cells packed tightly below
- Spongy mesophyll with air spaces
- Lower epidermis containing stomata
Inside a chloroplast (drawn as an oval with internal membranes), illustrate both light-dependent reactions occurring in thylakoid membranes and the Calvin cycle in the stroma. Use arrows to show that light energy powers the conversion of water and carbon dioxide into glucose and oxygen. Consequently, your diagram should clearly demonstrate this fundamental equation: 6CO₂ + 6H₂O + light → C6H12O6 + 6O₂.
Respiration process in mitochondria
When drawing cellular respiration, first sketch a mitochondrion with its characteristic double membrane and folded inner membrane (cristae). Subsequently, illustrate the three major stages:
First, represent glycolysis occurring outside the mitochondrion in the cytoplasm, breaking glucose into pyruvate. Furthermore, draw pyruvate entering the mitochondrial matrix where it converts to acetyl-CoA. Then show the citric acid cycle as a circular pathway in the matrix, producing electron carriers NADH and FADH₂. Finally, illustrate the electron transport chain embedded in the inner membrane, where oxidative phosphorylation generates most ATP.
Label each stage with its approximate ATP yield to emphasize where energy production occurs most efficiently.
If this is feeling like a lot to take in, that's completely normal. Many students find it helpful to work with an experienced IB tutor who can provide clarity tailored to their situation. Get in touch →
Final Touches and Exam Preparation
Perfect biology diagrams require more than just accuracy—your final touches and exam preparation strategies often determine your grade. Let’s finish our diagram mastery journey with essential finishing techniques. Learn more in our guide on Biology exam strategies.
How to label diagrams clearly
Labeling transforms basic drawings into informative scientific illustrations. Primarily, use a sharp pencil and ruler to create straight label lines. These lines should connect precisely to the structure with a small dot at the end—this dot helps readers identify exactly where your label points.
Arrange labels neatly with even spacing between them, forming a vertical list outside the diagram. Avoid intersecting label lines, as these create confusion and lose marks. Likewise, ensure label lines are parallel to the text, creating a cleaner, more professional appearance.
Common mistakes to avoid in biology diagrams
Even excellent students make common errors that cost marks. First, never improvise or draw what you think should be there—draw exactly what you see. Accordingly, avoid adding creative flourishes or unnecessary shading; biology diagrams demand objectivity over artistry.
Other frequent mistakes include:
- Using multiple pencil strokes for a single line (creates “feathery” lines)
- Drawing label lines with arrows instead of simple dots
- Making idealized versions instead of accurate representations
- Forgetting to include a proper title and magnification
Drawing straight lines freehand might seem acceptable, but examiners can immediately spot this shortcut. Nonetheless, the most critical mistake remains inaccurate proportions—always maintain correct size relationships between components.
How to practice for better retention
Regular practice undoubtedly strengthens your diagram-drawing skills. Start by understanding rather than memorizing—comprehending how components function helps recall their structure during exams.
Break complex diagrams into smaller parts, mastering one section before moving to the next. For instance, when learning brain anatomy, focus first on the cerebrum before adding cerebellum details.
Test yourself regularly by drawing from memory, then comparing with reference materials. Furthermore, redrawing, tracing, or printing diagrams from textbooks reinforces your understanding. Hence, create practice sheets with blank diagrams to label, gradually building speed and accuracy for exam conditions.
Conclusion
Drawing accurate biology diagrams remains a crucial skill that can significantly impact your grades. Throughout this guide, we’ve walked through various biological structures—from simple plant stomata to complex human organs and cellular processes. Above all, remember that clarity and accuracy matter more than artistic perfection when creating these scientific illustrations.
Most importantly, practice stands as the cornerstone of mastering biology diagrams. Rather than merely memorizing structures, focus on understanding the underlying functions and relationships between components. This approach will help you recall and recreate diagrams accurately during exams. Get our exclusive diagram pack prepared by IB ++tutors to supplement your practice with expert-designed templates!
Before your next exam, make sure to review the common mistakes we’ve discussed. Specifically, avoid improper labeling, inaccurate proportions, and unnecessary creative flourishes. Additionally, use the proper techniques for final touches—straight label lines with dots, neat arrangement, and appropriate titles.
Finally, approach each diagram methodically, breaking complex structures into manageable parts. While biology diagrams might seem challenging at first, the step-by-step processes outlined in this guide will transform your rough sketches into diagram masterpieces that impress teachers and boost your grades. Therefore, pick up your pencil, grab your ruler, and start practicing—your biology exam success awaits! You may also find our resource on studying biology effectively helpful.
Need Personalised Guidance?
Every student's situation is different. Our tutors can help you understand your options, plan your next steps, and make informed decisions about your IB journey. Find your tutor →
FAQs
Q1. Why are biology diagrams important for students?
Biology diagrams are crucial as they can account for up to 30% of marks in many science exams. They help students demonstrate their understanding of complex biological structures and processes visually, which is essential for scoring well in exams.
Q2. What are some key tips for drawing effective biology diagrams?
Focus on accuracy and clarity rather than artistic perfection. Use a sharp pencil and ruler for straight lines, maintain correct proportions between components, and label diagrams neatly without crossing lines. Practice regularly and break complex structures into smaller, manageable parts.
Q3. How can students improve their diagram-drawing skills for exams?
Regular practice is key. Understand the function of components rather than just memorizing them. Break complex diagrams into smaller sections and master each part. Test yourself by drawing from memory and compare with reference materials. Create practice sheets with blank diagrams to label, gradually building speed and accuracy.
Q4. What are common mistakes to avoid when drawing biology diagrams?
Common errors include improvising or drawing idealized versions instead of accurate representations, using multiple pencil strokes for single lines, drawing label lines with arrows instead of dots, and forgetting to include proper titles and magnification. Inaccurate proportions between components is also a critical mistake to avoid. Explore our detailed guide on study biology for more tips.
Q5. How should students approach labeling biology diagrams?
Use straight lines with small dots at the end to connect labels precisely to structures. Arrange labels neatly with even spacing, forming a vertical list outside the diagram. Ensure label lines are parallel to the text and avoid intersecting lines. Use a ruler for neatness and clarity, as proper labeling can significantly impact grades.
References
[1] – https://my.clevelandclinic.org/health/body/21704-heart
[2] – https://www.wikihow.com/Draw-a-Human-Heart
[3] – https://homework.study.com/explanation/draw-a-heart-and-label-a-both-sets-of-valves-and-chambers-of-the-heart-b-the-2-major-arteries-exiting-the-heart.html
[4] – https://www.youtube.com/watch?v=eagfhVLTHAU&pp=0gcJCdgAo7VqN5tD
[5] – https://mayfieldclinic.com/pe-anatbrain.htm
[6] – https://www.wikihow.com/Draw-a-Brain
[7] – https://www.hopkinsmedicine.org/health/conditions-and-diseases/anatomy-of-the-brain
[8] – https://openbooks.lib.msu.edu/introneuroscience1/chapter/external-brain-anatomy/
[9] – https://thelablearning.com/biological-drawing-skills/
[10] – https://www.biorender.com/learn/how-to-label-a-diagram
[11] – https://www.biologyforlife.com/lab-drawings.html
[12] – https://www.thebiologyjotterbook.com/post/drawing-biological-diagrams
[13] – https://thetutor.me/blog-detail/90/guidelines-you-must-remember-to-master-biology-diagrams
[14] – https://gurukulgalaxy.com/d/434-how-to-remember-biology-diagrams-and-classifications
[15] – https://cleverlyy.com/10-ways-to-make-biology-diagrams-made-easy/
[16] – https://www.unh.edu/student-success/sites/default/files/media/2022-07/biology-strategies.pdf